Generating and sending the supplement package
Once you've strengthened your line items, you're ready to generate the supplement package. ClaimOps builds a PDF with a cover letter, the line-item backup, and the evidence you attached. From there, you send it to the carrier — directly from ClaimOps or by downloading and delivering it your own way — and mark the claim as submitted.
This is the finish line for Round 1. Once you've marked the claim as submitted, ClaimOps tracks it so you can see where things stand and come back for Round 2 if the carrier responds with a partial approval.
Before you send: review the generated PDF
Always review the generated PDF before sending it to a carrier. ClaimOps builds the package from the estimates and evidence you uploaded — the output is only as accurate as the input. A quick review catches data errors, missing evidence, or anything that looks off before it reaches the adjuster.
Why it matters
The supplement package is the deliverable. Everything you've done — comparing estimates, strengthening line items, adding photos and code citations — comes together in this PDF. A well-reviewed, well-packaged supplement gives you the best shot at a fast approval from the carrier. A rushed one that goes out with errors sets you back.
What to do
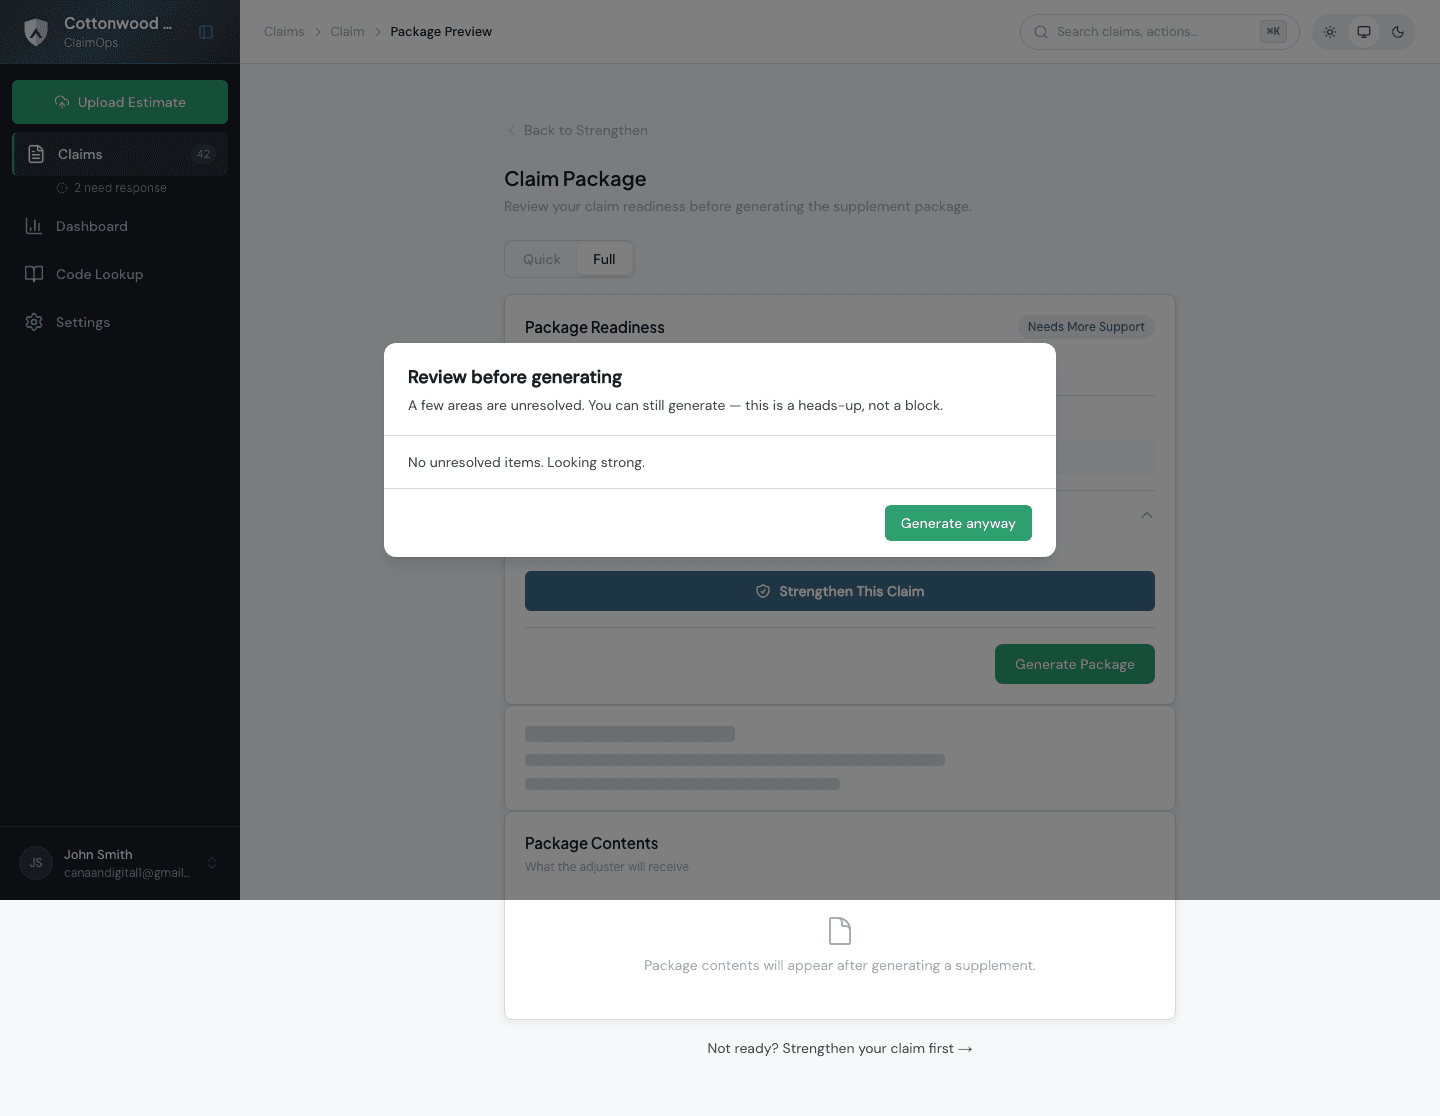
- 1Click Generate. From the Strengthen tab (or from the claim overview), click the Generatebutton. ClaimOps will build the supplement package — this usually takes under a minute. You'll get a notification when it's ready.
- 2Review the PDF — do this before anything else. Open the generated package and check: the line-item totals look right, the evidence is attached where you expect it, the cover letter has the correct claim number and carrier, and there are no obvious data errors. If something looks wrong, go back and fix the source data — the estimates, the evidence, or the support notes — then regenerate.
- 3Send to the carrier or mark as submitted. You have two options:
- Send from ClaimOps — click Sendin the pre-send modal. You'll confirm the recipient and delivery details before it goes out.
- Mark as Submitted (external) — if you're delivering the package by email, mail, or your existing workflow, download the PDF and deliver it yourself. Then come back to ClaimOps and click Mark as Submitted so the claim status updates and you have a record of when it was sent.
The pre-send modal — review the recipient details and confirm before the package goes to the carrier.
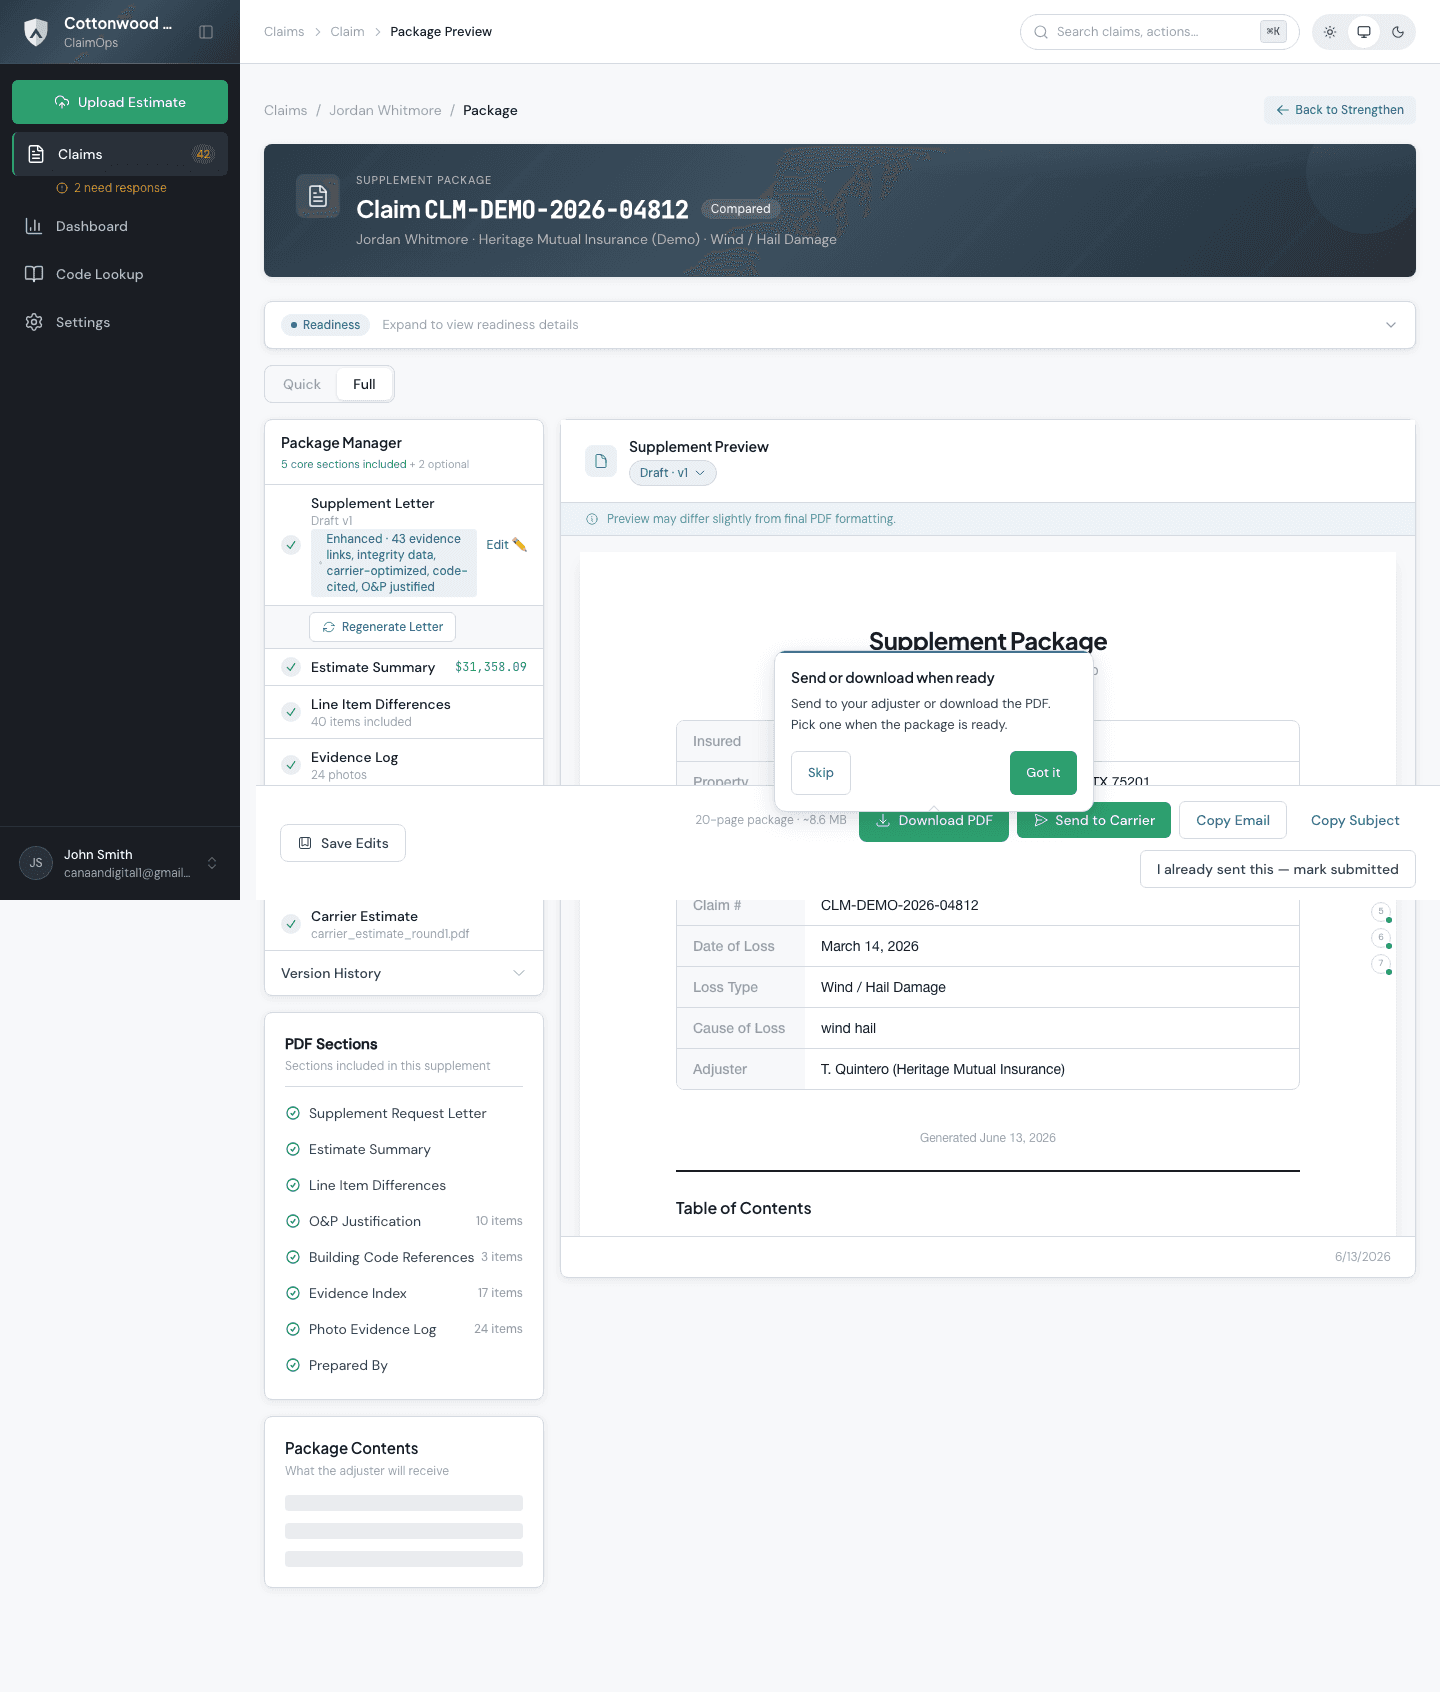
The generated supplement package — cover letter, line-item backup, and attached evidence in a single PDF. Always open and review this before sending.
What to check on the PDF before sending
- Claim number and carrier name — confirm they match the actual claim. A package sent with the wrong claim number creates unnecessary back-and-forth.
- Line-item totals — the dollar amounts on the line items should match what you saw in the comparison. If a number looks wrong, check the source estimates.
- Evidence appears where expected — photos and documents you attached during Strengthen should appear in the Evidence Index section of the package. If something is missing, go back to Strengthen and re-attach it, then regenerate.
- Cover letter tone and content — read the cover letter quickly. It's generated from your claim data. Make sure it reads as you'd expect.
- No placeholder text or blank sections — scan for anything that looks like template filler or unexpected blanks.
What to check after sending
After the package goes out (by either delivery path), confirm:
- The claim status in ClaimOps has updated to reflect the submission.
- You have a record of when it was sent and to whom — ClaimOps logs this once marked submitted.
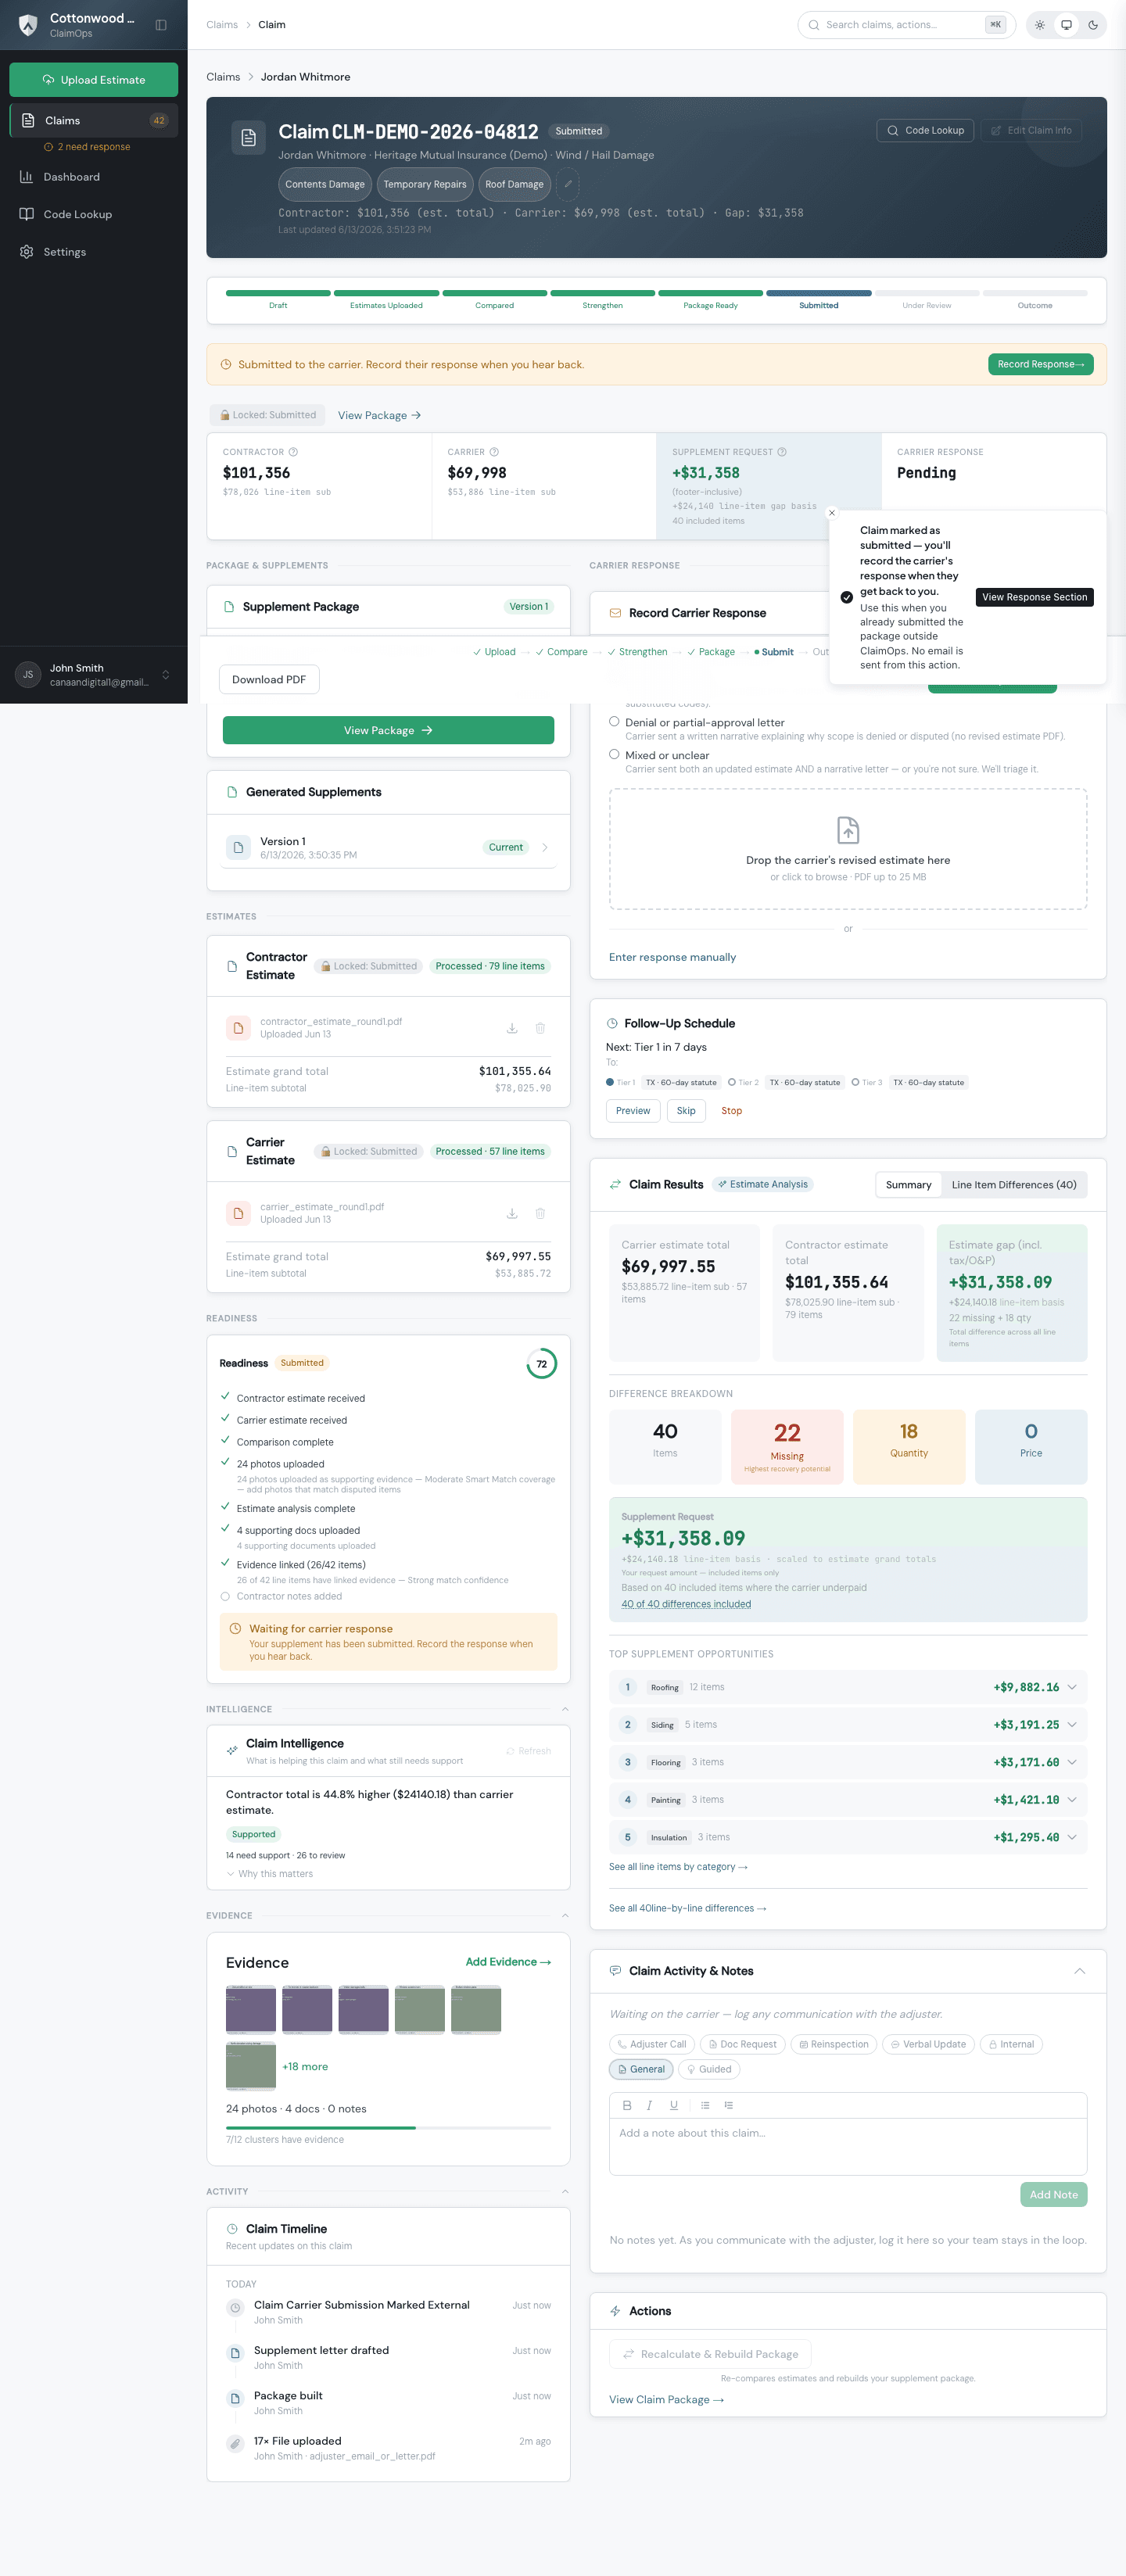
After sending or marking as submitted, the claim status updates so you can track where things stand and follow up if needed.
Common mistakes
- Sending without reviewing the PDF. This is the most common mistake. A 60-second review can catch data errors, wrong totals, or missing evidence before they become an adjuster's objection.
- Delivering externally and not marking as submitted. If you email the PDF directly, come back to ClaimOps and mark the claim submitted. Otherwise the status stays open and you lose your submission record.
- Generating before strengthening. You can generate a package at any time, but if you haven't added evidence, notes, or code citations, the package will be thin. Go back to Strengthen first.
- Assuming the package is final. If the carrier comes back with a partial approval, you can start a Round 2 supplement from the same claim. Nothing is final until the claim is fully settled. See Round 2 / carrier responses for how that works.
Where to get help
If the numbers in the generated package don't match what you expected, or if generation fails, use the Helpmenu in the app to contact support. Include the claim number and describe what looks wrong — a specific line item or dollar amount that's off is more helpful than a general description.
Once you've submitted Round 1, you're waiting on the carrier. When they respond, come back to the claim and check the Round 2 / carrier responses article for what to do next.